Installation of the Kisan Technologies Signalminder
My one regret of the '97 Pacific Coast is that in that year Honda decided to no longer install self canceling turn signals. I have always had trouble remembering to cancel my signal. Kisan makes a product called the Signalminder, it was all I could find to fill the void.
What the Signalminder does is cancel the signal after a user set number of flashes. This number is set with switches to 20, 40 or 60 flashes. Basic operation goes like this...
Switch the turn signal switch to the direction you wish to turn. The signal will begin to flash and count down from the number of flashes you pre-selected.
When the Signalminder counts to its preset number, it cancels the signal.
Now for the "catch." In order to use the signals again, you must push in the signal switch(cancel) to reset the signals.
The Signalminder also two configuration options you can setup at the time of installation. One is to connect your brake light circuit to the Signalminder. If you do this the "countdown" of the flashes is suspended whenever you have the brakes applied. I configured mine for the minimum flashes(20) and connected the brake light circuit. The other option will convert your turn signals to running lights. I opted against this feature for the moment.
One final feature of the Signalminder is that it provides a user selectable four way flash. If you flick your turn signal three times to the right your signals begin a four way flash.
I haven't had the Signalminder installed long enough to tell if I am going to find its operation acceptable. I'll try to remember to post an update to this "review" later if I have any strong opinions.
Here is the process I went through to install the Signalminder.
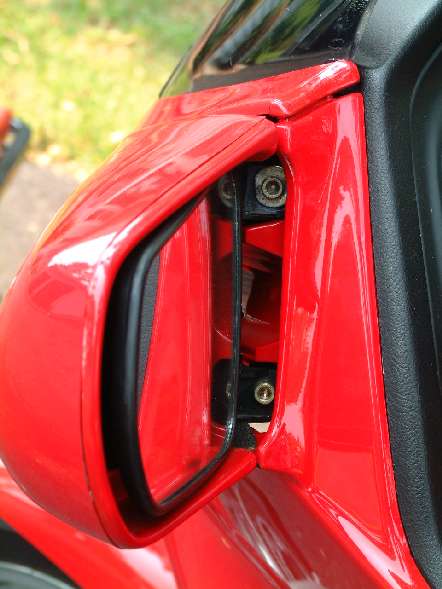
The first step is to remove the mirrors. You need to push the mirror in to reveal the screws and then remove the two screws that retain the mirror.
Once you remove the screws, the mirror is disconnected by removing the connector shown here.
Next you must remove the small grill below the windscreen. There are two screws on either side of the grill. In the picture below you can see the left one. The right one is in the opposite position.

The trim piece below the windscreen goes next. It is retained by a screw on each side like this one.
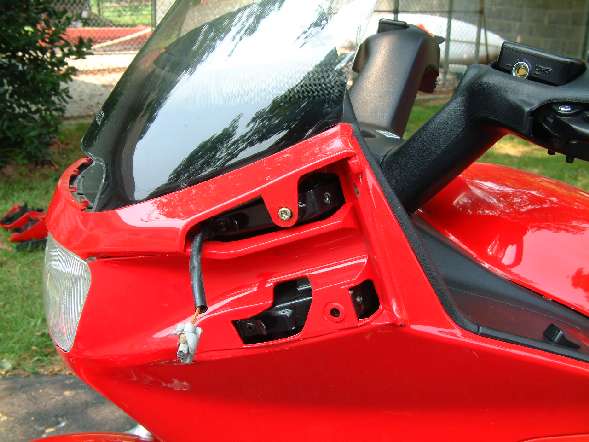
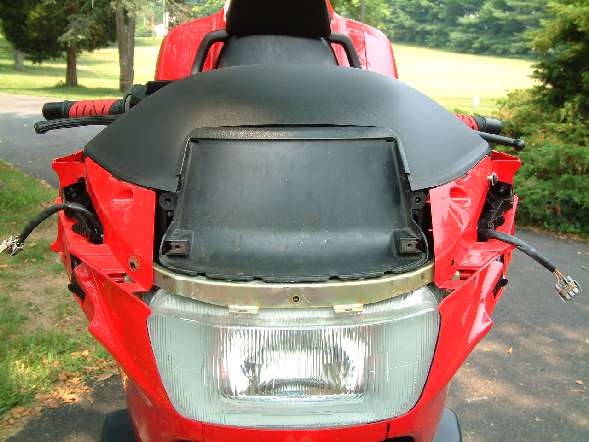
Once the two screws are out, the trim piece can be removed. This picture shows the bike with the trim removed. You can now see the five screws retaining the windscreen. Remove them and the windscreen comes off. There is also a large rubber gasket between the windscreen and the bike. Be careful not to tear it.
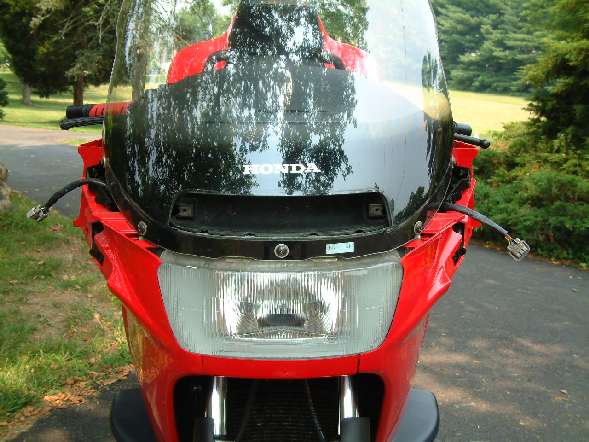
Once the windscreen is off you can see a cover over the back side of the instrument panel. Mine had no screws but it looks like there should be a screw on each side.
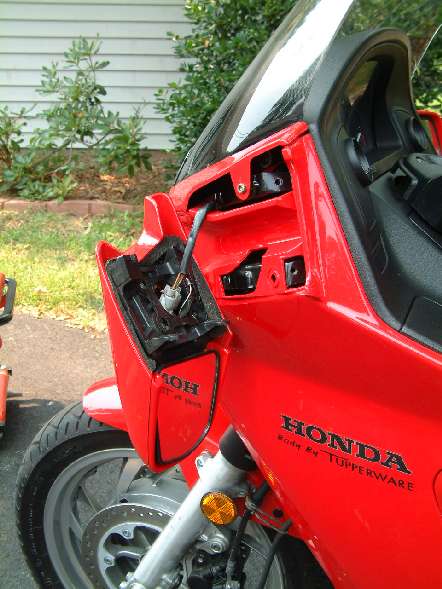
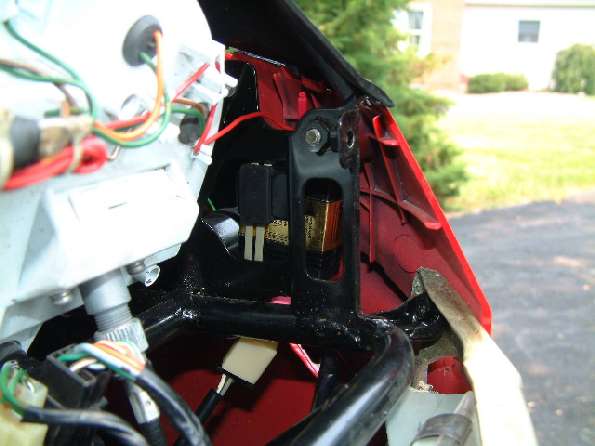
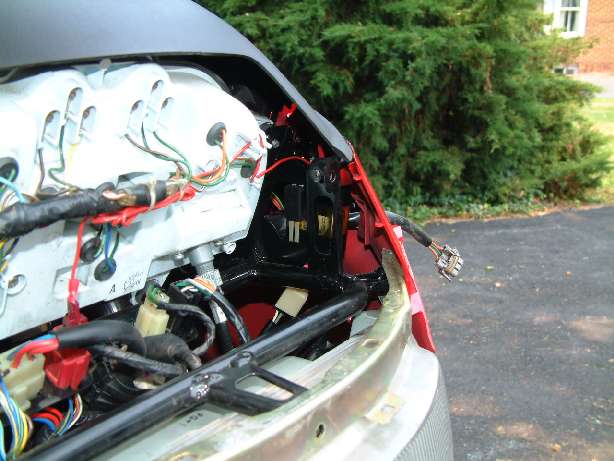
You see a lot in this next picture. Once the cover above comes off, you remove the flasher and replace it with the Signalminder. In this picture you see the Signalminder installed in the dash and a single red wire running from it to 12V from the brake lights.
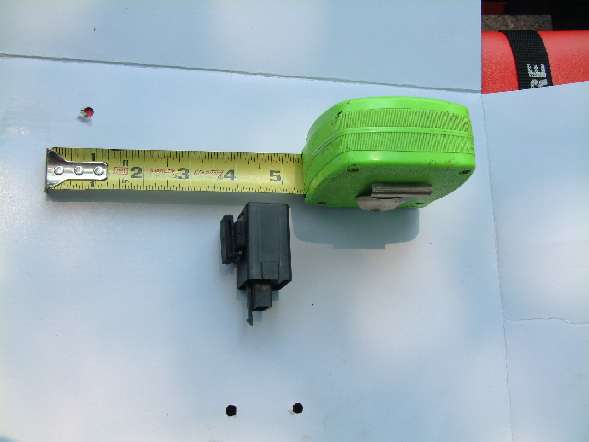
To install the Signalminder, I removed the rubber mount from the original flasher as seen here. The rubber mount just pulls off a clip on the flasher.
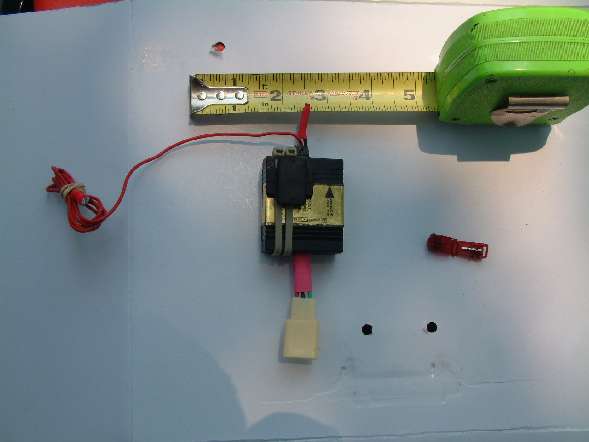
I then installed the rubber mount on the new flasher with two tie wraps. You can see the main connector that plugs into the existing harness on the bottom. At the top is the option connector where I connected +12V from the brake light circuit. This comes from the G/Y wire on the top left of the red connector in the dash(see below).
Here is the final installation. The red wire is connected using some neat little connectors provided called Scotchlocks.
That's it! Just reverse the process to put the bike back together.